2020-04-03
Windows 10 开启或禁用 Defender 的 PUA (PUP) 保护
微软(Microsoft)为了提高 Windows 10 企业版的安全性,默认情况下开启了 Windows Defender的 PUA (PUP) 检测功能。但是,对于Windows 10 家庭版和专业版,默认情况下是关闭 Windows Defender的 PUA (PUP) 检测功能。那如何在 Windows 10 家庭版和 Windows 10 专业版中开启 Windows Defender 的 PUA (PUP) 检测功能呢?
主要有 2 种方法,使用 Powershell 命令和手工编辑注册表来激活 Windows Defender的 PUA (PUP) 检测功能。
方法1:使用 PowerShell cmdle 命令配置 PUA 保护功能
1,按 Win + S
2,在搜索框中输入 powershell
3,鼠标右键单击 Windows PowerShell,选择 以管理员身份运行
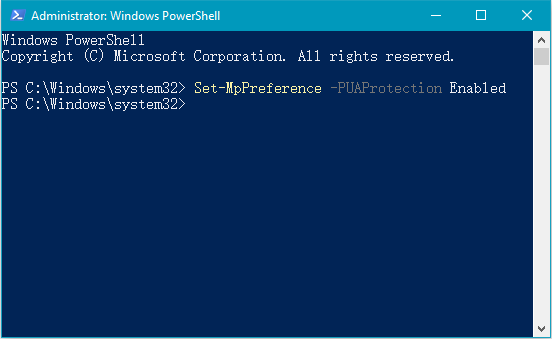
4,在 PowerShell 窗口中输入以下命令:
Set-MpPreference -PUAProtection enable
5,重启系统后,Windows Defender 的 PUA 检测功能已经启用。
提示:
使用命令 Set-MpPreference -PUAProtection disable ,可以将 PUA 功能关闭。
使用命令 Set-MpPreference -PUAProtection AuditMode ,当 Windows Defender 会检测 PUA 但不会阻止 PUA 运行。

方法2:编辑 Windows 注册表
在开始编辑 Windows 注册表之前,请进行完整的注册表备份。您可以参考此页面以了解如何备份完整的 Windows 注册表。
1,按 Win + R
2,键入 regedit,然后按回车键确认
3,在注册表编辑器中依次展开并找到:
HKEY_LOCAL_MACHINE/Software/Policies/Microsoft/Windows Defender
4,鼠标右键单击 Windows Defender,选择 新建 → 项,然后将其命名为 MpEngine
5,单击选中 MpEngine,然后在右侧区域单击鼠标右键,选择 新建 → DWORD (32-位)值,并将其命名为 MpEnablePus
6,双击 MpEnablePus,将数据值设为 1
7,重启系统,然后启用了PUA保护。
提示:
如果要禁用 PUA 检测功能,只需将 MpEnablePus 值更改为 0,或删除注册表项 MpEngine。
主要有 2 种方法,使用 Powershell 命令和手工编辑注册表来激活 Windows Defender的 PUA (PUP) 检测功能。
方法1:使用 PowerShell cmdle 命令配置 PUA 保护功能
1,按 Win + S
2,在搜索框中输入 powershell
3,鼠标右键单击 Windows PowerShell,选择 以管理员身份运行
4,在 PowerShell 窗口中输入以下命令:
Set-MpPreference -PUAProtection enable
5,重启系统后,Windows Defender 的 PUA 检测功能已经启用。
提示:
使用命令 Set-MpPreference -PUAProtection disable ,可以将 PUA 功能关闭。
使用命令 Set-MpPreference -PUAProtection AuditMode ,当 Windows Defender 会检测 PUA 但不会阻止 PUA 运行。

方法2:编辑 Windows 注册表
在开始编辑 Windows 注册表之前,请进行完整的注册表备份。您可以参考此页面以了解如何备份完整的 Windows 注册表。
1,按 Win + R
2,键入 regedit,然后按回车键确认
3,在注册表编辑器中依次展开并找到:
HKEY_LOCAL_MACHINE/Software/Policies/Microsoft/Windows Defender
4,鼠标右键单击 Windows Defender,选择 新建 → 项,然后将其命名为 MpEngine
5,单击选中 MpEngine,然后在右侧区域单击鼠标右键,选择 新建 → DWORD (32-位)值,并将其命名为 MpEnablePus
6,双击 MpEnablePus,将数据值设为 1
7,重启系统,然后启用了PUA保护。
提示:
如果要禁用 PUA 检测功能,只需将 MpEnablePus 值更改为 0,或删除注册表项 MpEngine。


